I've Moved!

I've Moved!
Please visit my new blog!

This blog contains affiliate links!

Some of the links in the posts on this blog are “affiliate links.” This means if you click on the link and purchase the item, I will receive an affiliate commission (Thank you!) Regardless, I only recommend products or services I believe will add value to my readers.
Email me ..........................
Showing posts with label Halloween. Show all posts

Thursday, September 14, 2017

Kiwi Lane A Touch of Magic–Halloween Ideas

There is so much news to share about Kiwi Lane I’m breaking it all up into multiple posts. 
Be sure to check out these posts, too:

Kiwi Lane - A Touch of Magic- perfect for Halloween & Harry Potter Layouts!

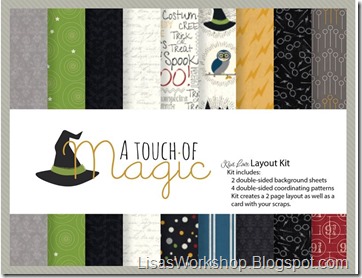
The Touch of Magic Layout Kit is perfect for the witches and wizards in your life! Whether you are scrapbooking a themed birthday party, or a trip to Harry Potter World, the results will be magical! You can also bring a Touch of Magic to any of your Halloween-themed layouts...or pick up two of these paper kits and create them both! This sold out quicker than you could say “Mischief Managed” BUT Kiwi Lane is bringing it back – and offering a pre-order! Pre-Orders are only being accepted until September 18th extended to September 22. Visit my KLD Instructor site at https://create.kiwilane.com/LisaGraham to place your order.

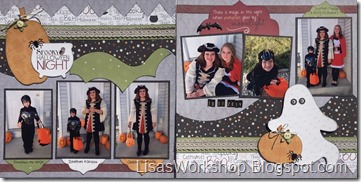
Halloween Ideas for A Touch of Magic (Click here to see Harry Potter Ideas for this kit)
Kiwi Lane - A Touch of Magic- perfect for Halloween & Harry Potter Layouts!Kiwi Lane - A Touch of Magic- perfect for Halloween & Harry Potter Layouts!Kiwi Lane - A Touch of Magic- perfect for Halloween & Harry Potter Layouts!Kiwi Lane - A Touch of Magic- perfect for Halloween & Harry Potter Layouts!Kiwi Lane - A Touch of Magic- perfect for Halloween & Harry Potter Layouts!Kiwi Lane - A Touch of Magic- perfect for Halloween & Harry Potter Layouts!Kiwi Lane - A Touch of Magic- perfect for Halloween & Harry Potter Layouts!

Kiwi Lane Pre-Sale

HOW WILL THE PRE-SALE WORK?

Kiwi Lane Pre-Sale

Simply place an order on my KLD Instructor site, from the Pre-Sale Shop Catalog online, BEFORE THE END OF MONDAY, September 18th for whatever quantity of Pre-Release products you would like. These items have been placed in a separate, online catalog, so only Pre-Release items can be added to this order.

Due to the circumstances of the situation, it will take a little while to fulfill these orders, so please be patient! You should expect your Pre-Release orders to ship around the middle of December. The digi-book you’ll get for free when you pre-order the new Idea Book will be delivered to your email address in October.  The hiccups associated with growth can be frustrating, and I greatly appreciate your patience and support!

Monday, October 24, 2016

Halloween Blog Hop

Hello & Welcome!!

You have reached the 3rd stop on the
CM Bloggers’ Halloween Blog Hop.  
Some of my sister
CM Advisors and I are sharing ideas and inspiration for your Halloween layouts and projects.  If you’re hopping in order, you’ve arrived from Karyn’s blog.  At the end of my post I’ll send you on your way to Julie’s blog.   Be sure to visit each stop – there are lots of  wonderful ideas being shared!  (More info, including the complete list of Blog Hop stops, is at the bottom of this post.)

I was inspired by the vintage look of the Bats in the Belfry Collection by Creative Memories to create these embellishments.

CM Halloween Blog Hop 
Have you tried CM’s new Repositionable Tape Runner Refill?  It was very handy when making these items.  The refill fits in the regular CM Tape Runner case! CM Halloween Blog HopThis adhesive comes out in a pattern of tiny dots, so it’s really good for small, intricate pieces and because it’s repositionable it’s super easy to make adjustments to your design.  After applying any excess adhesive rubs right off.   The adhesive becomes more tacky over time but never becomes permanent.   CM Halloween Blog Hop

For the base of each decoration you’ll need:

Snip just the bottom of each scallop of the 12” border so you can curve it around the circle.CM Halloween Blog Hop
Using the Repositionable Tape Runner – place adhesive on the lower, pointy part (the part you snipped) of the front side of the lace scallop border and on the edge of the back of your circle.

with the wrong side of the paper facing you (if using double sided paper), place the two ends of the border together on the circle and loosely place the rest of your border around the circle, adjusting & repositioning when needed.   Once you have the border in place, smoosh it down to flatten & adhere.  CM Halloween Blog Hop
Flip the base over and add layers to your design using items from the Bats in the Belfry collection. Everything coordinates so it’s really hard to go wrong!  Add circles that are cut with the Custom Cutting System, and punched with the Shape Maker System from the paper pack, add
stickers & embellishments using Foam Squares to add a bit of dimension.CM Halloween Blog Hop

The Scalloped Circle shown below was punched using the CM Shape Maker System and the 2” Scalloped Circle  punch from Fun Stampers Journey.  FSJ offers punches that work with CMs Shape Maker System! Read more in this earlier blog post.CM Halloween Blog HopCM Halloween Blog HopCM Halloween Blog HopCM Halloween Blog Hop

CM Halloween Blog Hop

CM Halloween Blog Hop

I hope these have inspired you! If can’t wait to see your version of this design…please feel free to share what you’ve created in my Lisa’s Workshop Facebook group. 

Thanks for stopping by!  I will now send you on your way to the next stop in the CM Bloggers Halloween Hop -  Julie’s blog.

Here is the complete line up for today’s Blog Hop: CM Bloggers’ Halloween Blog Hop

  1. Noreen Smith at Organized and Creative Mom
  2. Karyn McDermaid-Rolfe at Karyn Crops
  3. Lisa’s Workshop <-----You are here!
  4. Julie Tambrini at Julie’s Creative Memories Blog
  5. Candace Bouldin at Scrappin’ JPEGs

Happy Halloween!

Wednesday, October 13, 2010

Plastic Drinking Cup Mini – Lights

I got this great idea from Jo K. – thanks, Jo, for sharing!
It’s a set of cute little mini-lights that use Solo plastic cups (3 oz. size) as shades.  Once I gathered all the materials these took only about a half hour to make.
img_0540
The light strand is a set of 10 – I found it in the Dollar Spot at Target – they came with either pumpkin or skull plastic covers and were $2.50.   I also got the Solo 3 oz. plastic cups at Target – they have colored ones.  You can see a bit of the green cups peeking out – they coordinate with the Cheerful Halloween Additions I used. 
WCM083818
To make these first cut a plastic cup open and remove the top piece and bottom ridge.  Use the middle of the cup as a template for your covers and trace around it on paper.  Cut out the covers and stick them on the cups.  I used the Creative Memories Photo Tape to adhere the edges of the paper to the cup – don’t use the CM Tape Runner for this project – it shows through the paper when the lights are on. 
I used the Cheerful Halloween Additions which has 8 pieces of 4x6ish Storybox paper –each one big enough to cover one cup.   I had 10 lights to cover and  I didn’t want to cut into the 4 pieces of 12x12 paper that came with the kit so I used a few of the coordinating Storybox papers from the Cheerful Power Palette.  The colors coordinate perfectly!  I punched a few halloween shapes from the CM Halloween Micro-Maker and glued them to the inside of a few of the cups.  This is what those look like when lit:
img_0529  img_0532   I also saw some blue cups that I think I’ll have to get and use with the Winter Cheerful Additions!
WCM083832
I’ll be up at the Novi Sheraton this weekend at Camp Crop-A-Lot – stop up & say “Hi” if you’re in the area!!

Thursday, October 8, 2009

Boo!

Just sharing a couple of REALLY quick projects I did today.

IMG_8306

The beakers of candies I picked up at WalMart.  They were only $3 each!  The cute little labels are freebies from the CM Project Center –they’re in the Digital Freebies section. I just imported them into SBC+ (instructions for this are on the Project Center) then printed them off onto regular  paper and stuck them onto the bottles.  The center jar is filled with my newest addiction…sour pumpkins by Zachary you can find them at Meijer. 

I cut a circle using the Custom Cutting System out of paper found in the new Halloween Additions Kit and added a sticker from the same kit to the top of the lid.

(This kit is now only available in a Digital format)

IMG_8307

Doesn’t get much easier than that!  Thanks for looking!