I've Moved!

I've Moved!
Please visit my new blog!

This blog contains affiliate links!

Some of the links in the posts on this blog are “affiliate links.” This means if you click on the link and purchase the item, I will receive an affiliate commission (Thank you!) Regardless, I only recommend products or services I believe will add value to my readers.
Email me ..........................
Showing posts with label Altered Items. Show all posts

Thursday, December 10, 2015

Sweet Treats– Fun to Make & Give!

Dress up treats in a snap with CMs time saving tools!
Here are some quick ideas for stocking stuffers, classroom treats or a little something for someone special.  Each project only takes a few minutes with the help of some great timesaving tools by Creative Memories!  

Elf Legs

Dress up treats in a snap with CMs time saving tools!


Pants: Double up a piece of the red striped paper from the Christmas Joy paper pack about four inches.  Using the Shape Maker System and the Square Cartridge punch out a square leaving the folded edge intact (shown below).  Cut a small triangle (from both layers) on the edge opposite the fold as shown in the photo above.  Add stitching detail using the fine tip of the Black Dual Tip Pen.  
 
Dress up treats in a snap with CMs time saving tools!
Buttons:  Leftovers from the Border Maker System and the Bubbles Cartridge.  Add dots with the fine tip of the Black Dual Tip Pen.  
Shoes:  Using the Circle Cartridge from the Shape Maker System punch out a circle from black cardstock then place the paper back into the Shape Maker System and punch out a crescent shape.
Dress up treats in a snap with CMs time saving tools!
Make 2 of these crescent shapes.  Fold each crescent in half and trim a little bit off the bottom.  
Apply a good amount of Tape Runner adhesive to the inside of the pants and shoes, making sure to get both sponts on the paper where the Sixlets will be placed. Assemble as Shown.
Bell/Ball on the shoes:  Leftover circles from the Border Maker System and the Bubbles Cartridge.
Buckle:  use the Filmstrip Cartridge with the Border Maker System and punch out a small border from white cardstock.  Trim down one of the hollow squares on the edge of the border. (I found the Sixlet candies at my local Dollar Tree store.)


Candy Pinwheel

Dress up treats in a snap with CMs time saving tools!
Using the Shape Maker System and the Square Cartridge punch one square from double sided paper.  Cut from each corner to almost the center.  Place a good amount of adhesive in the center of the square using your Tape Runner.  Fold every other point to the center and press down.  Place more adhesive in the center and adhere a Hershey's Kiss candy.  Adhere a tube of Sixlet candies to the back of the pinwheel as shown. 

Candy Cane Mouse 
Dress up treats in a snap with CMs time saving tools!
 
NoteSee this blog post for info about the system below to identify Circles & Ovals with the Custom Cutting System.
Body & Ears:  From the grey patterned paper in the Christmas Joy paper pack cut the following using the Custom Cutting System & Oval Patterns:
7IR
5IG(2)
Cut from light red/pink designer cardstock:
5IB(2)
Gently fold the large oval in half lengthwise and make two cuts just a little off center as shown below.

Dress up treats in a snap with CMs time saving tools!

Eyes & Nose: Leftover circles from the Border Maker System and the Bubbles Cartridge
Adhere ears, eyes and nose as shown.
Add whiskers using the fine tip of the Black Dual Tip Pen.  Slide on a candy cane for the tail. 


Hot Cocoa Kit
Dress up treats in a snap with CMs time saving tools! 
Supplies Needed: 
  • Sandwich bag
  • Instant hot cocoa packet
  • Cocoa mix-ins.  I used Hershey’s Kisses and cute peppermint marshmallows I found at Target but you can have a lot of fun with this!  Other things you could add: a candy cane, plastic spoon dipped in chocolate or caramel with sprinkles/salt/peppermint added before it hardens; caramel squares…lots of possibilities!
Put the goodies in the plastic bag & close it up.  Measure the width of your plastic bag and also how far down you want the topper to go. Double this last measurement.  If you want the topper to come down an inch & a half, cut the paper 3” x the width of your plastic bag.  Fold this in half and decorate as shown.  I used the new Lace Flower Chain cartridge with the Border Maker System and punched out a border from both red and green cardstock.  I trimmed several flowers from the red border and adhered those to the green border. Once the topper is decorated you can add a quick note or To: / From: on the back and adhere it over the plastic bag. 

Candy Cane Rudolph
01f533ccd37c9c0d7bc92ac7c12aae4b012275e8cf
Wrap a piece of brown cardstock around 2 candy canes placed side by side.  The piece I used measures 3 1/2” x 2 1/2”. You may need to adjust yours depending on the size of the candy canes you use. Put a line of adhesive on one of the shorter ends of the cardstock.  Place the adhesive lined side of the cardstock facing up on the back of the candy canes & wrap cardstock around the candy canes until it overlaps and adheres in place.
01b4ef1c792c96c923a9e1211c732f93c09ab97dde
Add eyes & nose made from leftover circles from the Border Maker System and the Bubbles Cartridge.  

I hope these treats help to sweeten the holiday season!

Merry Christmas!! 

Friday, November 18, 2011

A few projects using ‘Tis the Season CM Cricut Cartridge

These are some very quick items I made up to have on my Gift Buffet at my Open House using the ‘Tis the Season CM Cricut cartridge.  I use my Open House to reward my customers and to thank them for their business.  I have about 15 - 20 baskets on my Gift Buffet that have different events/tasks associated with them.  Things like visiting my blog,  joining my Facebook group, turning in a Wish List, ordering from my CM website, etc.  I have mostly photo & scrapbook related products but like to have some other fun things, too.  Like these:

Hand sanitizer with “Fa La La” cut out of adhesive backed vinyl.

dscn1957

Elf Bottoms – can you tell what image I used to make the shoes?  Here’s a hint…it’s folded in 1/2 and cut in 2.  Sixlet candies are used for the legs. 

dscn1958

Here’s the shape used to make the shoes: 

“Joy” cut from gold vinyl. 

I didn’t use my Cricut on the one below but thought they were cute & I’d share.  I created the bag topper in SBC+

Used Junior Mints and a Red Hot for the noses. Smile

dscn1960

Happy Holidays & be sure to check out my calendar on my CM website if you’re in the SE Michigan area and would like to attend one of my events!

Wednesday, October 13, 2010

Plastic Drinking Cup Mini – Lights

I got this great idea from Jo K. – thanks, Jo, for sharing!
It’s a set of cute little mini-lights that use Solo plastic cups (3 oz. size) as shades.  Once I gathered all the materials these took only about a half hour to make.
img_0540
The light strand is a set of 10 – I found it in the Dollar Spot at Target – they came with either pumpkin or skull plastic covers and were $2.50.   I also got the Solo 3 oz. plastic cups at Target – they have colored ones.  You can see a bit of the green cups peeking out – they coordinate with the Cheerful Halloween Additions I used. 
WCM083818
To make these first cut a plastic cup open and remove the top piece and bottom ridge.  Use the middle of the cup as a template for your covers and trace around it on paper.  Cut out the covers and stick them on the cups.  I used the Creative Memories Photo Tape to adhere the edges of the paper to the cup – don’t use the CM Tape Runner for this project – it shows through the paper when the lights are on. 
I used the Cheerful Halloween Additions which has 8 pieces of 4x6ish Storybox paper –each one big enough to cover one cup.   I had 10 lights to cover and  I didn’t want to cut into the 4 pieces of 12x12 paper that came with the kit so I used a few of the coordinating Storybox papers from the Cheerful Power Palette.  The colors coordinate perfectly!  I punched a few halloween shapes from the CM Halloween Micro-Maker and glued them to the inside of a few of the cups.  This is what those look like when lit:
img_0529  img_0532   I also saw some blue cups that I think I’ll have to get and use with the Winter Cheerful Additions!
WCM083832
I’ll be up at the Novi Sheraton this weekend at Camp Crop-A-Lot – stop up & say “Hi” if you’re in the area!!

Thursday, February 18, 2010

Frappuccino Bottle Cocoa Set

IMG_8675

I love cute marshmallows!  I saw these heart shaped ones at The Dollar Tree and picked up a few bags –knowing I wanted to do something with them for Valentines Day.  Marshmallows go perfectly with hot cocoa so I decided to make a cute hot cocoa gift set for each of the boy’s teachers.

I bought  a couple of 4 packs of Kroger brand frappuccino – the ones that come in the little carriers.  (Note for future projects:  start earlier – those frapps (even the light ones) aren’t as good when you have to drink them by a deadline!) - and then removed the labels.  The Kroger brand labels are shrink wrapped so they were really easy to remove.  I traced the shape of the carton on the wrong side of the paper I wanted to use, cut it out and adhered it to the carrier.  I dressed it up with a bit of coordinating paper, paper flowers and clear quote stickers. 

For the bottle lids I cut a thin piece of paper with the CM Rotary Trimmer, then placed that around the edge of the cap.  I used circles punched with the CM Circle Maker and put them on the top of the lid, labeling each with the contents in the jar.

IMG_8674

I kept this really simple because I liked to see the cute stuff in the bottles.  You could decorate the bottles, too if you wanted to dress it up more. 

Besides the heart marshmallows I’ve seen red (really pink) & green trees for Christmas and brown, orange & white ghosts for Halloween.  I just bought some really cute pastel colored bunny marshmallows - all of these were at Target :)

IMG_8673

Marshmallows, Cocoa Mix, Pocky Sticks & candy hearts.

The Pocky sticks I found in the international aisle (asian foods, I think) of my local Kroger.  They are chocolate covered “biscuit” sticks – cookies I think – and the pink ones are strawberry flavored.  I thought they would be cute stirrers for hot cocoa.

The set above features paper from the retired Cherish kit.

This is the other set I did and it uses paper and paper flowers from the Delight Power Palette.

IMG_8670

The teachers loved them!

Thursday, October 8, 2009

Boo!

Just sharing a couple of REALLY quick projects I did today.

IMG_8306

The beakers of candies I picked up at WalMart.  They were only $3 each!  The cute little labels are freebies from the CM Project Center –they’re in the Digital Freebies section. I just imported them into SBC+ (instructions for this are on the Project Center) then printed them off onto regular  paper and stuck them onto the bottles.  The center jar is filled with my newest addiction…sour pumpkins by Zachary you can find them at Meijer. 

I cut a circle using the Custom Cutting System out of paper found in the new Halloween Additions Kit and added a sticker from the same kit to the top of the lid.

(This kit is now only available in a Digital format)

IMG_8307

Doesn’t get much easier than that!  Thanks for looking!

Wednesday, April 8, 2009

Peeps in a Jar – Easter S’mores.

I saw this project on a bunch of websites & made up some for Easter gifts for teachers & other special “peeps” :)

If you Google “Peeps in a jar” you’ll find lots of examples & methods for making these.  I combined a few & here’s what I did:

Crush 1 sleeve of graham crackers into crumbs & dump into the bottom of a canning jar – if you use ones with the wide mouths I would imagine it would be much easier, but I had these on hand.

Place your Peeps in the jar – against the side.  I used the end of a wooden spoon to smush the last one in. 

In the center of the Peeps place 1/3 cup of brown sugar.  This was easiest to do when I packed together several little clumps & dropped them into the jar.  Then I tamped it down using the bottom of a gravy ladle.  Place 1 1/4 cup of M&Ms on top & you’re almost done!

Here is a link to sheet of tags I made with Storybook Creator Plus.  They have the baking directions to make the Peeps S’mores.

I also made a circle label for the top.   

It features this little guy made with SBC+. You should be able to click on it, then right click on the picture & use “save as” to save it to your computer & import it for use in your digital projects.


This was a fun & easy project & would be great for other holidays, too – I know I’ve seen lot of other types of Peeps – pumpkins, ghosts, snowmen –pair them up with seasonal M&Ms & you have tons of possibilities!!

Happy Easter!

Monday, December 22, 2008

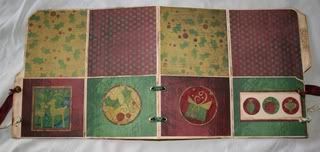
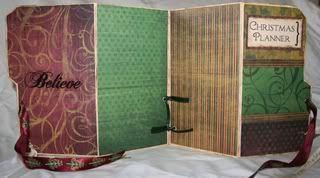
Christmas Planner from a File Folder

 
I am so pleased with how this came out - and it was so easy! I started with a regular file folder, added a little paper & embellishments & have this great little planner! I taught a class on how to make these types of planners at the Spring '09 Camp Crop-A-Lot at the Novi Sheraton & they were a huge hit! I think these would be great planners for all sorts of things; Disney Vacation, Menu Planner, Everyday Planner. Lots of possibilities! If you want to make your own - here's how I did it.
 
Open up your folder and measure about 8" from the top. Fold up the bottom along this line - this will create the pockets.
Now, most of you know I'm not an measuring kind of gal. When I make future projects I'll do my best to take more care to record what I'm doing because I know some people like precise measurements when crafting. But for now - just trust me & know that these planners are pretty hard to mess up! So with that in mind - fold in each edge of the planner towards the center. I first fold in the side with out the tab right up to the center fold - then fold over the tabbed edge so it meets up with the edges of the other folds.

I wanted to make the edges look sort of aged so I used a brown CM round tip pen on a q-tip and rubbed all of the edges.

Most of the paper and stickers I used for this planner are from the Creative Memories Starry Night Album Kit. I love how everything coordinates without any thought required! I printed on a piece of cardstock "Christmas Planner" and "Receipts". The "Believe" word sticker on the tab was cut from one in the Everyday Power Pallette. Not sure which retired Power Pallette the "Believe" sticker on the back was from, but there is a similar one in the Jewel Title Stickers


So, measuring each of the areas to be covered I then chose which paper I wanted, trimmed it to fit about 1/4" smaller than the pocket & adhered it with CMs Photo Tape. I freehanded around the curves and other irregular shapes on the folder. Once you've decorated your planner the way you like you can now create the pockets. I also used the Photo Tape for this - just along the two sides. I have had my planner in my purse for over a month - jam packed with lists & coupons, receipts, etc & it has held up amazingly well. I love that photo tape!

Once everything was decorated I used an eyelet tool to punch holes and then added eyelets & ribbon.
I printed off my own lists & papers so that they would match the title on the front of the planner. If you don't want to go to all that trouble you can visit OrganizedChristmas.com where they have TONS of ideas - including pages for these types of planners


To make the receipt envelope I sealed a letter sized envelope, trimmed down one of the edges by an inch or two. I then used the CM Circle Maker to cut a notch in the envelope and paper. I trimmed a bit off the straight edges of the paper on each side of the circle so that it would line up when placed a bit below the edge of the envelope. I also used the Photo Tape to adhere the paper to the envelope.


A fun thing I did was decorate these paper clips to use in the planner. I used the mini Circle Maker to punch out 2 circles, then put Photo Tape on the inside of each circle - sandwiched the paperclip between the sticky circles & pressed together. I would think you could also use the Precision Point Adhesive, too, but I wanted instant gratification :)


Here is a Disney Planner I made using the same method


Papers and stickers used are from the Disney Mickey Power Palette Additions from Creative Memories. 

Don't hesitate to contact me if you have any questions & please let me know if you've tried this project yourself. I'd love to see what you come up with!