I've Moved!

I've Moved!
Please visit my new blog!

This blog contains affiliate links!

Some of the links in the posts on this blog are “affiliate links.” This means if you click on the link and purchase the item, I will receive an affiliate commission (Thank you!) Regardless, I only recommend products or services I believe will add value to my readers.
Email me ..........................
Showing posts with label Creative Memories. Show all posts

Monday, September 24, 2018

Sunflower Inspired Borders

Have you seen the new CM Pumpkin Spice Collection?  The printed paper pack has one of the prettiest sunflower prints!  It inspired me to create these borders using the Sunshine Border Maker Cartridge.

Sunflower Borders - Lisa's WorkshopAll printed papers shown are from the Pumpkin Spice paper pack. To help everything stand out a bit I inked the edges (with distress ink and a dauber from Kiwi Lane) and added a little detail with a fine tipped pen. I used my trusty (and retired) CM Shape Maker for the circles and FSJ Scalloped Circle Punch w/the CM (retired) Shape maker System. I punched the Sunshine shapes out of a piece of brown printed paper and filled the center of the sunflowers with the "leftovers" - the Repositionable Tape Runner Refill came in very handy w/this border!

Sunflower Borders - Lisa's WorkshopSimilar process as the border above but I used a border punched from the On the Vine Border Punch as a background.

Sunflower Borders - Lisa's WorkshopThis Bronze Shimmer Cardstock is so much nicer in person! It's a nice weight and punched very easily.

Sunflower Borders - Lisa's Workshop

Items used to make these borders

Pumpkin Spice Printed Paper Sunflower Borders - Lisa's WorkshopSunflower Borders - Lisa's Workshop

Bronze Shimmer CardstockSunflower Borders - Lisa's Workshop

Sunshine Border Maker CartridgeSunflower Borders - Lisa's Workshop

On the Vine Border Punch
Sunflower Borders - Lisa's Workshop

Hope these brighten up your day & your pages!!

Sunflower Borders - Lisa's Workshop

Saturday, September 22, 2018

Gather Together Collection

Did you join in on the fun during Creative Life Scrapbooking PJ Party last night?  If not, no worries!  The posts are on our FB page and you can access them when it’s convenient.  The PJ Party featured ideas using the Gather Together collection from Creative Memories.

Gather Together by Creative Memories

I think CM knocked this one out of the park!  The Gather Collection is fun & flowery but not too feminine, making it very versatile! The patterned papers, embellishments and mats have a fall theme and I think this collection was perfect for these photos! 

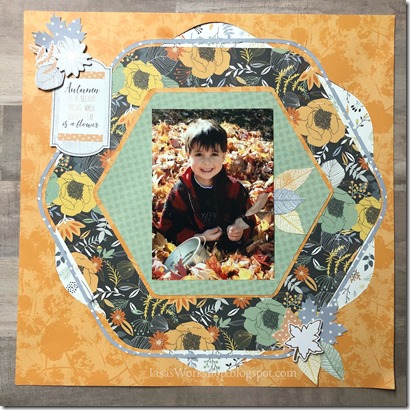
Gather Together by Lisa's WorkshopLots of hexagons cut with the CM Custom Cutting System! They made a nice background for one of my favorite photos. I fussy cut out those leaves that are tucked behind the photo and in the embellishment cluster at the bottom of the page, but it was easy - not fussy at all!Gather Together by Lisa's WorkshopHexagon Sizes Shown: From the orange paper I cut a hexagon using the outside of the pattern with the Blue Blade. I then trimmed this hexagon down using the Red Blade & outside of the pattern but flipped the paper over to the dark floral pattern. The grey hollow hexagon was also cut using the outside of the hex pattern & first the Blue Blade then the Green Blade. Cuts made inside the hex pattern were made for the orange hexagon using the Green Blade and the green hexagon using the Blue Blade.

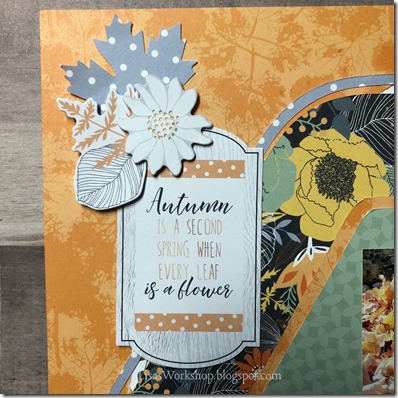
Gather Together by Lisa's WorkshopSince the left side layout was a little busy I wanted to keep this side a little more simple. Using mats from the Variety Mat Pack under the photos helped to make this page come together in a snap!Gather Together by Lisa's WorkshopTucked a maple leaf behind one of the foil embellishments to help tie it together with the rest of the layout. Gather Together by Lisa's WorkshopThe yellow & green leaves are cut from one of the Gather Together patterned papers. The grey leaf is punched with the Maple Leaf Punch and the other 2 are from the embellishment pack.

Gather Together by Lisa's Workshop

Thanks for visiting!!  Hop on over to Lisa’s Workshop or CLS to share your version of this layout, or another using the Gather Collection! 

Products Featured in this layout:

Gather Together EmbellishmentsGather Together EmbellishmentsHexagon CCS PatternMaple Leaf PunchGather Together Variety Mat PackGather Together Patterned PaperGather Together Patterned Paper

Lisa's Workshop

Monday, December 4, 2017

*HOT* Imagine Collection from CM!

Imagine Collection by Creative Memories on Lisa's Workshop

NEW COLLECTION: IMAGINE
Starting Monday, December 4th at 4 pm ET on my CM Advisor site, you can grab all your family vacation photos and share magical memories using the new Imagine collection! Inspired by fun-filled family adventures, this collection features whimsical hand-doodled designs in red, black and yellow, and is perfect for everything from birthdays to graduations, fairs, theme parks, carnivals, parties, kids’ photos and more.

Imagine Collection by Creative Memories on Lisa's Workshop

The collection includes an Ebony Album Cover with a foiled castle design, Paper Pack, Variety Mat Pack, Stickers, Laser Cut Embellishments, a complementing Tone-on-Tone Paper Pack, 8x8 Fast2Fab™ Album with a Ruby album cover with a foiled cloud, star and fireworks design, and 8x8 Fast2Fab™ Refill Pages.

Close up of detail on 12x12 Imagine CoversetImagine Collection by Creative Memories on Lisa's Workshop

Paper PacksImagine Collection by Creative Memories on Lisa's Workshop
For your most fun-filled family photos, take a trip into a land of imagination with the Imagine Paper Pack! This 12x12 vacation, celebration and theme park scrapbook paper features a bold red, yellow and black palette, and whimsical, hand-doodled designs infused with elements such as fireworks, polka dots, twinkles, stars and adventurous words. It’s the perfect backdrop for photos from birthdays, fairs, theme parks, carnivals and parties to recitals, kids’ photos and more.
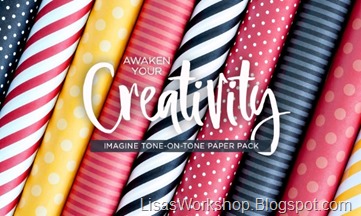
Imagine Collection by Creative Memories on Lisa's WorkshopNEW: Imagine Tone-on-Tone Paper Pack
Complement your Imagine designer papers with the Imagine Tone-on-Tone Paper Pack! It features lively stripes and polka dot designs in tone-on-tone hues.
This Paper Pack works great for school or sports team colors with black, red or yellow!
Take a fun flip through the Paper Pack!
https://youtu.be/EQIgltr0TLQ

8x8 F2F Album & PagesImagine Collection by Creative Memories on Lisa's WorkshopImagine Collection by Creative Memories on Lisa's Workshop
Check out the 8x8 Imagine Fast2Fab™ by clicking here:
https://youtu.be/snaRcTcREfQ

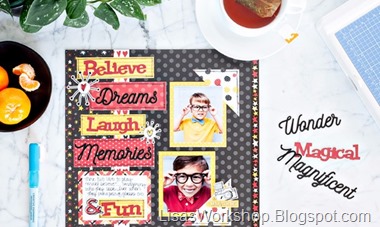
Stickers & EmbellishmentsImagine Collection by Creative Memories on Lisa's Workshop
Imagine Collection by Creative Memories on Lisa's Workshop

Mat PackImagine Collection by Creative Memories on Lisa's Workshop

Teardrop Lattice Border PunchImagine Collection by Creative Memories on Lisa's WorkshopAdd playful OR elegant edges to scrapbook layouts, cards and projects using this punch!

Digital ArtworkImagine Collection by Creative Memories on Lisa's Workshop

You can find all these magical products on my CM Advisor site by clicking here.

Thursday, August 31, 2017

Sunshine & Rainbow

Today’s Friday Featured Project over at Creative Life Scrapbooking is a fun, simple way to brighten up your pages. 

CLS Friday Featured Project - Lisa's Workshop
This comes together quickly thanks to the Creative Memories Custom Cutting System.

If you’re not familiar with the CCS Labeling System please see this earlier post.

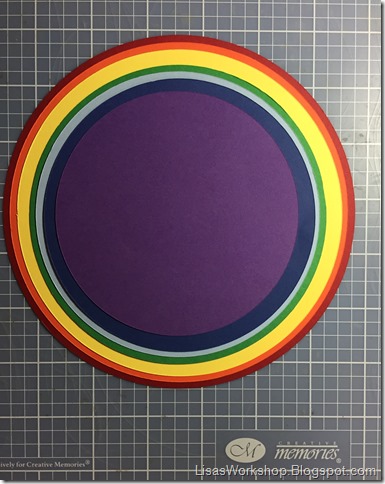
Using the CCS and the Circle Patterns I cut the following circles:
Red – 3OB
Orange – 3OG
Yellow – 3OR
Green – 2OB
Blue – 2OG
Indigo – 2OR
Violet - 1OB
Inside of Rainbow/Background paper – 1OR

CLS Friday Featured Project - Lisa's WorkshopYou can see from the photo above that the circles don’t match up exactly.  There is a bit of a gap between circles cut from different patterns.

CLS Friday Featured Project - Lisa's Workshop
I nestled the circles together a bit towards the top and then adhered them all together, cutting this large circle in half to make a rainbow. 

CLS Friday Featured Project - Lisa's Workshop
To make the clouds, I used the (no longer available) Word Bubble Punch and snipped off that little pointy bit.  I outlined these with the bold tip of a Dual Tipped blue pen to help them stand out a little.

CLS Friday Featured Project - Lisa's Workshop
I placed a circle in the center of the rainbow cut from cardstock that matched the background paper to make it look like an arch instead of a circle.


The sun was also made using the CCS – I added strips of paper for the rays.
Orange - 3IG
Yellow – 3IB

Hope this brightens your day!

Please contact your Creative Memories Advisor to purchase any Creative Memories products.
If you don't already have a Creative Memories Advisor, I’m happy to help! 

You can find more information about the Creative Memories products used in this project on my CM Advisor site at:
http://www.creativememories.com/user/lisagraham
or if you’d like to contact me directly you can do that by clicking on the “Email me” link at the top of this page.

Monday, June 12, 2017

Cap & Gown Collection by Creative Memories

Creative Memories Cap N Gown Collection
It’s Monday and that means
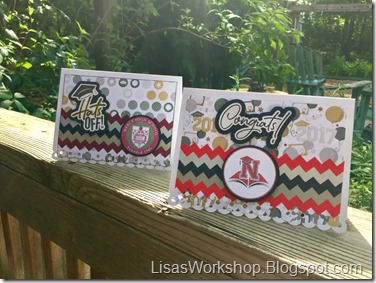
Creative Life Scrapbooking is sharing ideas featuring the CM Border Maker.  Today I shared an idea for graduation cards that can easily be adapted for your graduation themed layouts!  I’m sharing a little extra information about the tools I used to create the cards in this blog post.
Creative Memories Cap N Gown CollectionThe Cap & Gown patterned paper was perfect for these cards but often when placing items (photos, stickers, etc.) directly on top of patterned paper they get lost and are hard to see. To help the embellishments stand out a bit, I matted them with solid colored cardstock and cut them out with my Brother ScanNCut.  (See the bottom of this blog post for more info about this wonderful machine).  You could also freehand this cut using your All Purpose Scissors.
Creative Memories Cap N Gown Collection
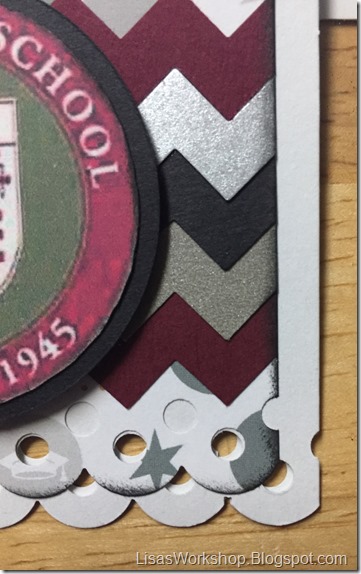
I also used the CM Border Maker System & the Zig Zag Cartridge to make a more neutral background. The Cap & Gown collection by CM features artwork in neutral tones so it was easy to personalize the cards by using cardstock that matched the school colors. I created elements using images found online, which I printed with my home printer and also cut out with my ScanNCut.  You can also use your Custom Cutting System and Circle Patterns to cut around similar images. 
Creative Memories Cap N Gown Collection

On this card, I used Black Licorice Fusion Ink by Fun Stampers Journey to edge around the patterned paper, helping to define it just a bit.  This is a tip I learned from Kiwi Lane
Creative Memories Cap N Gown Collection
Fun Stamper's Journey Fusion Ink
(LOVE FSJ Inks.  They are a fusion between pigment and dye so they dry quickly and are water resistant!)

I added a little detail to the bottom edge of the card using the CM Border Maker System and the Scallop Dot Cartridge. I added a final touch on the inside with stickers from CM's Cap & Gown Collection.
Creative Memories Cap N Gown Collection
The mats for these stickers show below were cut using my Brother ScanNCut Machine. 
Creative Memories Cap N Gown CollectionCreative Memories Cap N Gown Collection
Brother ScanNCut!
The ScanNCut makes quick work of cutting out stamped, printed images and comes in really handy when you want to cut a mat around stickers like I did for the cards shown above.   The best part? You don’t need to be connected to a computer or the internet to do this.  The large scanning area is also great for scanning documents, photos, artwork etc. to a USB that can be easily transferred to your computer.  I still love my Silhouette for creating/cutting SVGs but the ScanNCut beats it hands down when it comes to print & cut (I could never get the PixScan mat/option to work consistently for me).

See how easy it is to use the Brother ScanNCut in the video below!


Congratulations to the Class of 2017!!
Lisa's Workshop