I've Moved!

I've Moved!
Please visit my new blog!

This blog contains affiliate links!

Some of the links in the posts on this blog are “affiliate links.” This means if you click on the link and purchase the item, I will receive an affiliate commission (Thank you!) Regardless, I only recommend products or services I believe will add value to my readers.
Email me ..........................

Wednesday, November 21, 2012

Happy Thanksgiving!

Just wanted to take a moment to thank YOU!  I am so blessed to be able to help support my family while doing something I love & I couldn’t do it with you.  Consultants, customers, family & friends - thank you for your business and support!

Here is a little turkey I made in SBC+   Feel free to use him with your digital projects.

turkey

You should be able to right click on it & save to your computer. 

Not sure how to add outside content to SBC+?  Here is a quick tutorial.

Importing Freebies into Storybook Creator Plus 4.0

Thanks to my talented sister CMCs for sharing these ideas:

Shawna Bartimoccia made this cute gobbler using the Circle Maker, Heart Pocket Punch, Starburst Pocket Punch & Ribbon Maker

shawna wright bartimoccia

This shows all the supplies needed Smile

shawna wright bartimoccia turkey

Brenda Wilkinson made this little guy – using the Circle Maker, Leaf Maker and Border Maker System & Picket Fence cartridge.

brenda wilkinson

You could easily make a holiday pie (at least a paper version) using the Scallop Circle Maker as the crust and the Circle Maker as the filling – cut into wedges for individual slices.

I hope you have a very Happy Thanksgiving!!

Stuff Your Stockings Sale

Here is a great chance to get free product while picking up some great products.  Free products with your $75 purchase & even more when you spend $225.  If you place your order before 10 p.m. CST on the 21st you’ll get an additional bonus.  Click the flyer below for full details or view the pdf here.  Happy shopping!

sale

Wednesday, October 31, 2012

Happy Halloween!

Just a few ideas to help you with your photos of your little ghosts & goblins!

Frankenstein’s Monster – made using cuts from the Traveler CM Cricut Cartridge, Circle Maker, Star Maker (or the edge of the Square Maker) & Foam Squares.

frankenstein

Download a pdf with instructions here.

CCS Candy Corn   Using one of the Circle Patterns from the Custom Cutting System – pick one of the circles & cut  the larger size for orange paper, the middle size for yellow and the smaller Circle maker for the white tip.  Cut the circle into 8 pieces.  You can use the Corner Maker on the edges and add detail with the fine point of CMs Dual Tip Pens. 

piece of candy corn

Some titles for your Halloween themed pages.

image

You can download the pdf here.

Thank you to my fellow CMCs for sharing their ideas!

Fun ideas using the Scallop Circle Maker – thanks to Lynn Seymour for sharing!

Lynn Seymour

Ideas Featuring the Border Maker System

These are by Lydya Hulst:Lydya Hulst2

This idea is by Diana Parent:

Diana Parent

And this cute variation of  the Gingerbread Chain Border Maker Cartridge by Linda Phelps:

linda phelps

and this one from Jill McLeester

jill mcleester

This fun page is by Bethany Castaneda

bethany castaneda

Happy Haunting!

Wednesday, October 24, 2012

Crop & Shop– November 3rd in Livonia


We’ll have plenty of space, great food & lots of time to work on your projects!  We will also have various home based businesses available so you can start your holiday shopping early! 

There is no cost to stop in & shop!

Crop & Shop

Host a table at Croptoberfest scrapbooking event to earn these Chalking Inks, free, as my gift to you for hosting.

Hope to see you at St. Mikes!  Contact me if you have any questions!

Saturday, September 8, 2012

Fabulous Fall!

Finally – it’s Fall!    Time for sweater weather, pumpkin flavored everything & fun fall inspired projects! 

At the Patch 12x12 layout

At the Patch - Rustic Fence Border Scrapbooking Layout

Rustic Fence Border Maker Cartridge
Hocus Pocus 6x6 Stack Pack
Cardstock:  Brown, Green Apple & Carrot
Cheerful Seasons Cricut Cartridge
Foam Squares

How to Create:
Use a sheet of Green Apple Cardstock as your layout base.

Add two sheets of beige argyle patterned paper from the Hocus Pocus 6x6 Stack Pack to the layout as shown.

Add some accents punched out from the stack pack as shown.

Punch a border from Brown Cardstock using the border maker system and the Limited Edition Rustic Fence Border Maker Cartridge and add it to the bottom of the layout.

Using a Cricut machine and the Cheerful Seasons Cartridge cut a pumpkin accent and title letters from brown, orange, green, and beige paper. Add them to the bottom right side of the layout layering some of the letters on the Hocus Pocus banner punch outs.

Back to School 12x12 layout

 Autumn Additions Scrapbook Layout

Ingredients:
Autumn Addition
White Cardstock
Circle Maker


How to Create:
Place orange and red Autumn Addition mats on background paper as shown, staggering the red mat so it is about 3/4” lower than the orange mats.

Crop photos to 3-1/4 x 3-3/4”. Place the right and left photos so they are even with the top of the red mat and touching the edges of the red mat. Center the middle photo.

Cut a strip of White Cardstock that is 1/2” wide. Trim 2” off and place under the left photo. Repeat for the right side. Cut a 2 ½” long piece and place vertically above the middle photo.

Punch a large circle with the Circle Maker and place a leaf sticker on it. Repeat with a second leaf sticker. Center the circles under the left and right photos.

Print the journaling on White Cardstock using brown ink. Trim the journaling block to 2x2”. Adhere the journaling to the brown leaf mat and randomly cut around it. Adhere under the middle photo. Place the apple sticker on the bottom right corner.

Place the Autumn Additions title sticker on White Cardstock. Trim and place above the middle photo.

Football Wall Print Poster

Super Star Football Digital Scrapbooking Wall Print Poster

Ingredients:

  • StoryBook Creator 4.0 Software
  • Football Digital Additions

    How to Create:

    1. Create a new 16x24 Wall Print Poster project.
    2. Add Football Paper 3 to the top of the poster.
    3. Add Football Paper 4 to the bottom of the poster.
    4. Add a large photo across the center of the poster.
    5. Add the Super Star embellishment.  Under the Format tab, add the Cord surface.
    6. Add the MVP embellishment.
    7. Add the name, filling with Football Paper 1.  Add a light shadow.
    8. Add the Gold Star and Player 1 embellishments.  Add the Cord Surface to each.
    9. Add the Touchdown title.
    10. Add the school and mascot as desired.
    11. Order on the Creative Memories Digital Center.   Please use my  Consultant Id #96470395 when ordering from the digital center.


Saturday, August 18, 2012

Cropping for Causes - Using Digital Embellishments in Traditional projects.


Welcome to the croppers stopping by after the  fundraiser crop for Inflammatory Breast Cancer!  Please take a moment to learn about the symptoms of IBC – it is a rare and very aggressive form of breast cancer.  It is usually not detected by mammograms or ultrasounds. 

I was lucky enough to be asked to contribute to the goody bags for this crop and thought it would be a good chance to feature some of Creative Memories Think Pink products.  A portion of the sales from this line go to the Breast Cancer Research Foundation (BCRF), an organization I am proud to be associated with! 

Unlike many organizations that associate themselves with raising awareness for breast cancer (like the Susan G. Komen Foundation) the BCRF does not have a huge portion of their funds going to pay immense salaries, lawsuits against those that use “for the cure” in their efforts to raise funds for other causes and they most certainly do not fund other organizations.  You can be sure that by contributing to the BCRF and buying CMs Think Pink products you’re actually helping to fight against breast cancer. 

BCRF continues to remain one of the most fiscally responsible charities in the country.
BCRF holds a 4-star rating from Charity Navigator, its tenth such designation since 2002.
Additionally, BCRF is the only cancer organization designated as "A+" by CharityWatch.

If you print the image below as a 4x6 print you will be able to punch out the buttons with CMs Circle Maker and use them on your traditional projects.  They look great on top of the Scallop Circle, too.  crop2

This was created using CM’s digital scrapbooking program – Storybook Creator Plus (SBC+).  I use this program for so much more than scrapbooking!  Flyers, invitations, gifts, album covers – SBC+ is an easy to use program that can help you create custom items quickly!

Here are some items I did to show you just a few quick and easy ideas to mix digital and traditional items – creating hybrid items.

The Think Pink line is available while supplies last!  If you want these items order them before they’re gone!
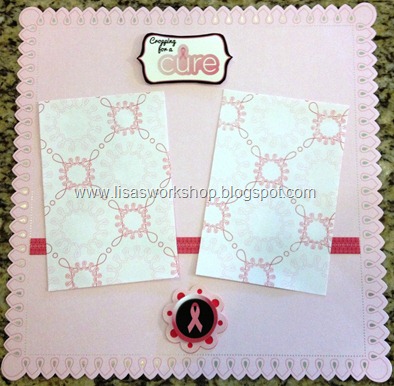
IMG_0722

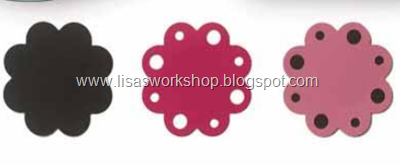
This page uses decorative cardstock  (it has beautiful silver foil accents) and printed paper for the photo mats are from the Think Pink Specialty Pack.  The paper ribbon is from the Think Pink Embellishment Pack.  “Cropping for a cure” title and ribbon button embellishments are from the Think Pink Digital Kit and are included in the freebie print at the top of this post.  The button at the bottom of the page is mounted with Foam Squares on top of a Scalloped Circle punched out of Pink Shimmer Cardstock and that is adhered to a scalloped circle punched out of Raspberry Cardstock.  The Scallop Circle Maker punches out 2 shapes.  Sliding the lever on the base allows you to choose which shape to cut – scallop, or decorative scallop.

image

image

IMG_0725

Paper and die-cut border at the top of the page are from the Think Pink Specialty Paper Pack.  I used the Silver Metallic pen to accent the edges of the photo mats and journaling strips.  Layering a black scalloped circle underneath a pink one gives the embellishment a bit of a shadow.  Ribbon button is from the Think Pink Digital Kit and can be found in the freebie at the top of this post.

Epoxy Sticker is from the Think Pink Embellishment Pack.

IMG_0721

I used the computer to print out the “Think Positive…” sentiment for this card.  Much easier, more precise and a lot cheaper than using stamps!

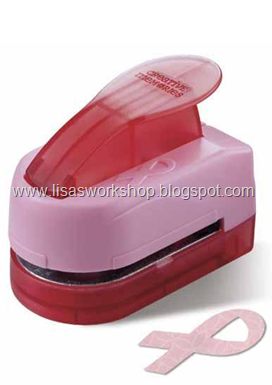
CM also has a Ribbon Maker that can be used to create all sorts of awareness ribbons.
image

I love helping out with fundraisers!  Please let me know if you need help raising funds!  Even if you’re not local I’d love to help!

Thursday, August 16, 2012

Dry Erase Boards for Practice Schedules

The Photo Panels from Creative Memories can be a great way to display favorite photos – but they can also be used as a dry erase board.  Here’s a few I created and can be personalized with your team colors, names, etc.  You can preview these and order them directly from the CM Digital Center (minus the watermark).  These are a 12x12 size but I can easily upload them in an 8x8 size.  These make great fundraisers, too!  I’m happy to help your organization raise money.  Contact me for more details!

photo panel - gymnastics

View the Gymnastics Dry Erase Board at the Digital Center

JG FB

View the Football Dry Erase Board at the Digital Center

photo panel - volleyball

View the Volleyball Dry Erase Board at the Digital Center

Sports Photo Panel - Page 002

View the St. Mikes Dry Erase Board at the Digital Center

If you buy the dry erase pens that are magnetic you can glue a metal washer to the back of the photo panel and you’ll have a handy spot to keep a dry erase marker! 

dscn2041_thumb4

dscn2040_thumb4

I recently found fine tip magnetic dry erase pens at Target with the school supplies.

dry erase magnetic pens at target