


I am so pleased with how this came out - and it was so easy! I started with a regular file folder, added a little paper & embellishments & have this great little planner! I taught a class on how to make these types of planners at the Spring '09 Camp Crop-A-Lot at the Novi Sheraton & they were a huge hit! I think these would be great planners for all sorts of things; Disney Vacation, Menu Planner, Everyday Planner. Lots of possibilities! If you want to make your own - here's how I did it.
Open up your folder and measure about 8" from the top. Fold up the bottom along this line - this will create the pockets.
Now, most of you know I'm not an measuring kind of gal. When I make future projects I'll do my best to take more care to record what I'm doing because I know some people like precise measurements when crafting. But for now - just trust me & know that these planners are pretty hard to mess up! So with that in mind - fold in each edge of the planner towards the center. I first fold in the side with out the tab right up to the center fold - then fold over the tabbed edge so it meets up with the edges of the other folds.
I wanted to make the edges look sort of aged so I used a brown CM round tip pen on a q-tip and rubbed all of the edges.
I wanted to make the edges look sort of aged so I used a brown CM round tip pen on a q-tip and rubbed all of the edges.
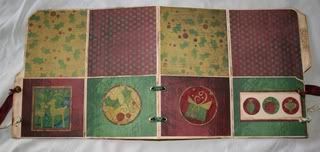
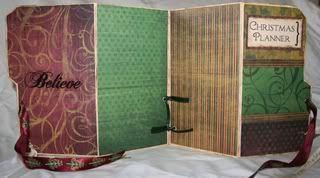
Most of the paper and stickers I used for this planner are from the Creative Memories Starry Night Album Kit. I love how everything coordinates without any thought required! I printed on a piece of cardstock "Christmas Planner" and "Receipts". The "Believe" word sticker on the tab was cut from one in the Everyday Power Pallette. Not sure which retired Power Pallette the "Believe" sticker on the back was from, but there is a similar one in the Jewel Title Stickers

So, measuring each of the areas to be covered I then chose which paper I wanted, trimmed it to fit about 1/4" smaller than the pocket & adhered it with CMs Photo Tape. I freehanded around the curves and other irregular shapes on the folder. Once you've decorated your planner the way you like you can now create the pockets. I also used the Photo Tape for this - just along the two sides. I have had my planner in my purse for over a month - jam packed with lists & coupons, receipts, etc & it has held up amazingly well. I love that photo tape!
Once everything was decorated I used an eyelet tool to punch holes and then added eyelets & ribbon.
I printed off my own lists & papers so that they would match the title on the front of the planner. If you don't want to go to all that trouble you can visit OrganizedChristmas.com where they have TONS of ideas - including pages for these types of planners

To make the receipt envelope I sealed a letter sized envelope, trimmed down one of the edges by an inch or two. I then used the CM Circle Maker to cut a notch in the envelope and paper. I trimmed a bit off the straight edges of the paper on each side of the circle so that it would line up when placed a bit below the edge of the envelope. I also used the Photo Tape to adhere the paper to the envelope.

A fun thing I did was decorate these paper clips to use in the planner. I used the mini Circle Maker to punch out 2 circles, then put Photo Tape on the inside of each circle - sandwiched the paperclip between the sticky circles & pressed together. I would think you could also use the Precision Point Adhesive, too, but I wanted instant gratification :)
A fun thing I did was decorate these paper clips to use in the planner. I used the mini Circle Maker to punch out 2 circles, then put Photo Tape on the inside of each circle - sandwiched the paperclip between the sticky circles & pressed together. I would think you could also use the Precision Point Adhesive, too, but I wanted instant gratification :)

Here is a Disney Planner I made using the same method


Papers and stickers used are from the Disney Mickey Power Palette Additions from Creative Memories.
Don't hesitate to contact me if you have any questions & please let me know if you've tried this project yourself. I'd love to see what you come up with!